Showing posts with label All Food. Show all posts

Friday, August 12, 2011

Better Vanilla Cupcakes

By far, the most difficult cupcake for me to make is vanilla... don't ask me why or I might remember all the failed batches and start crying again. I came up with my own recipe based on my Key Lime cupcake recipe in a crunch a few weeks ago. This cupcake is not eggy and has a similar texture to a pound cake. Enjoy!
For the cake:
2 sticks (16 tbsp.) unsalted butter, room temperature
2 cups natural cane sugar
3 cups unbleached flour
1 tsp. salt
2 tsp. baking soda
6 egg whites, room temperature
1 cup sour cream, room temperature
1 tsp. vanilla extract
2/3 cup whole milk

For the icing:
2 sticks (16 tbsp.) unsalted butter, room temperature
2 cups (16 oz.) cream cheese, room temperature
1 1/2 cups powdered sugar
1 tsp. vanilla extract
1/2 of the seeds in a vanilla bean

Preheat the oven to 350°. Line muffin pans with paper liners or mini muffin pans with mini liners.
Cream the butter and sugar in the bowl of an electric mixer fitted with the paddle attachment on high speed, until light and fluffy. On medium speed, add the egg whites, 1/2 at a time, then add the sour cream and vanilla. Scrape down the sides then add the milk. Turn the speed to medium-low and beat for another minute. Stop the mixer.
Sift together the flour, salt, and baking soda in a bowl. With the mixer on low speed (stir), add the flour mixture to the butter mixture until just combined. Fill the cupcake liners to the 2/3-level with batter. Bake in the center of the oven for 20 to 25 minutes for full-size or 15 minutes for mini. They’re done when a toothpick comes out clean. Cool to room temperature.
While the cakes cool, make the icing. Mix the butter, cream cheese, sugar, and vanilla in the bowl of an electric mixer fitted with the paddle attachment, on low speed until the sugar incorporates, then turn it up to high and whip for about 3 minutes. Spread the frosting generously on top of each cupcake.

Makes 2 dozen full-size cupcakes.

Thursday, July 21, 2011

Goat Cheese Tarts, Lemon Tarts, and Summer Happiness

Wow so I have done a terrible job keeping this blog up to date. Jake and I have been extremely busy this summer and have only been able to spend one weekend in DC since our trip to Mexico in May! That combined with our shotty internet at home completes my totally valid excuse :)

Don't feel too bad for us though...

 At the tequila shot bar in our hotel in Mexico for our one year anniversary!
 Jake's favorite beach bar ever...

 Weekend trip to Charlottesville, VA
 Home to Richmond for Jake's sister's engagement party and....
 to see high school friends.
 Family trip to Chicago to see my sister who totally is wearing/stole my shirt
 And finally to NY to meet Ms. Molly Murphy (My cousin's first kid!)


And now for the food part of this post..


Since we've been gone every weekend, getting the motivation to go grocery shopping and cooking well balanced meals for the 4 nights we are in town has been non existent. Jake has not been complaining with the addition of Noodles and Co., Chipotle, and various happy hour deals to our weekly dinner rotation... However, I did get in one fancy home made item in in the past 3 months.... Father's Day Lemon Tarts and Goat Cheese tarts. I love tarts during the summer - simple, refreshing, and can be topped with all of the pretty summer fruits.

Note: The goat cheese tarts are only for those with a serious love of goat cheese... While some of my family members loved them, I think I could have swallowed a gym sock with a less disgusted look on my face... I've always hated goat cheese so I don't know why I thought this would have gone better... Next time I'll use cream cheese instead.


Shortbread Tart Crust: (From Joy of Baking)
1 cup (130 grams) all purpose flour
1/3 cup (35 grams) confectioners (powdered or icing) sugar
1/8 teaspoon salt
1/2 cup (113 grams) cold unsalted butter, cut into pieces


Butter or lightly spray with a nonstick vegetable cooking spray, an 8 - 9 inch (20 - 23 cm) tart pan with a removable bottom. 
In your food processor, place the flour, sugar, and salt and process to combine. Add the butter and pulse until the pastry starts to come together and form clumps. Place the pastry in the prepared tart pan and, using your fingertips, evenly press the pastry onto the bottom and up the sides of the pan. (Can use the back of a spoon to smooth the surface of the pastry.) Pierce the bottom of the crust with the tines of a fork. (This will prevent the pastry crust from puffing up while it bakes.) Cover and place the pastry crust in the freezer for 15 minutes to chill. (This will help prevent the crust from shrinking while it bakes.)
Preheat oven to 425 degrees F (220 degrees C) and place rack in center of oven. 
When the pastry is completely chilled, place the tart pan on a larger baking sheet and bake until the crust is golden brown, about 13 - 15 minutes. Remove from oven and place on a wire rack to cool while you make the filling.

Lemon Curd:

I used the same recipe as my lime curd, just used lemons instead :)

Goat Cheese Mousse: (From Tartelette)

200 ml heavy cream, cold
4 oz (120gr) goat cheese, at room temperature
2 tablespoons (25gr) to 1/4 cup (50gr) sugar, depending on your preference
Juice and zest of half a lemon


In the bowl of a stand mixer fitted with the whisk attachment, whip the cream to medium stiff peaks and reserve it in the refrigerator while you prepare the mousse.
In a medium bowl, whisk together the goat cheese and sugar with a spatula (if the goat cheese is soft enough there is no need to put your mixer to use on that one). Add the lemon zest and juice and mix thoroughly until incorporated.
Carefully fold the reserved whipped cream into the goat cheese base by placing your spatula in the center of the bowl, scooping the bottom over the top. Give your bowl a 45 degree turn and repeat until the batter is smooth. Fill a pastry bag with the mousse and divide it evenly among all tart cooled tart shells.

Top tarts with your favorite berries and serve slightly chilled.

We have some more busy weekends ahead of us but this coming weekend I will be doing Ashley's cupcake tasting (followed up by a recap on here hopefully) and then headed off for our family beach week :) Summer does not suck.

Monday, May 23, 2011

Scratch Sheppards Pie

So Jake and I have been "trying" to be more money conscious. I'm still amazed that anyone under the age of 50 can put a 20% down payment on a house.. Stupid financial reality of needing to plan ahead set in and this would be us being grown ups and trying not to go out to dinner 173 times a week. So instead of going to Rocklands for the best BBQ in DC that happens to be in walking distance of us (and most likely where the majority of income has gone), I went to the kitchen without a plan and tried out my creative cooking skills. I had some ground beef, a package of mashed potatoes and a can of peas... In comes Sheppard Pie. I had never made it before but it's one of Jake's favorites.


Recipe:
1 package ground lean beef
1 package mashed potatoes
1 can peas
2 tbs butter
2 tbs flour
1 cup chicken stock
4 tbs light sour cream
4 tbs Worcestershire sauce
1/2 Italian cup bread crumbs
1 tbs minced garlic
1 tbs minced onion
olive oil
salt and pepper

Add beef, garlic, onion, salt and pepper to heated pan and cook until browned. In a separate pan, melt butter and whisk in flour until paste forms. Whisk in chicken stock and simmer until thin gravy forms. Stir in sour cream and pour over cooked beef. Mix in Worcestershire and peas while beef mixture is on low heat. Spread  mashed potatoes over beef mixture trying to cover in single layer. Sprinkle bread crumbs over mashed potatoes and lightly drizzle with olive oil. Place under broiler for about 4 minutes or until bread crumbs are slightly browned.

This recipe turned out pretty delicious and made for some kick butt left overs as well.
You can add also add green beans and carrots if you want a more traditional pie but we were going for the "what ever it takes not to spend money at the grocery store" theme that night.
This is what was left before I went back for thirds....

Jake loved this dinner, but I mean what guy complains about meat and potatoes?

Wednesday, May 11, 2011

Tart Love - Lime Curd Tarts


I needed a break from cupcakes.. this may or may not have been due to my compulsive habit of eating batter and giving myself tummy aches... And in comes my new love of tarts :) These bite sized babies are light, refreshing, and help with your fruit intake for the day. I decided to try out my tart making skills with a lime tart recipe which turned out pretty delicious.


 First thing - the dough. I was pretty scared of this since I suck at anything dough related. I found this recipe and went full speed ahead. I ended up adding some extra ice water to make the dough not as crumbly. My dough did not turn out as planned looks wise but the taste did work well with the lime curd.

Dough Recipe from Tartelette

1 1/4 cups all purpose flour
1/4 tsp salt
5 tablespoons butter, cold and cut into small slices
3 to 4 tablespoons ice cold water

Prepare the dough:
Mix together the flour and salt in a large mixing bowl. Cut in the butter with a pastry cutter or a fork until the mixture forms pea-sized pieces. Sprinkle 2 tablespoons of water over the flour mixture and toss with fork until moistened. Repeat with the remaining water, one tablespoon at a time and gather the dough into a ball with your hand. Do not handle the dough too long. Wrap into a sheet of plastic wrap and refrigerate for 30 minutes. This will allow the dough to relax and make it easier to roll, keeping it from becoming tough. Roll dough on a lightly floured surface, applying pressure from the center to the edges until it is about 1/4-inch thick. Cut out six 6- inch circles onto the dough and press them into the tartlet molds or rings (or one 9 inch pan if making a larger tart). Place the rings or molds on a baking sheet. Prick the dough with a fork, apply a piece of parchment paper inside the molds and fill with dry beans or pie weights. Refrigerate 30 minutes. Preheat oven to 350F and when ready, bake for 10-12 minutes. Let cool completely and remove the pie weights and paper. Keep the oven at 350F.

Second thing- the lime curd. I've never made curd before so this was almost as scary as the dough.. I tried making it in a home made double boiler but the temperature wasn't getting high enough for the mix to curd (<- right term?). I did get a pretty hard core arm work out trying though. I moved the mixture to a sauce pan over medium low heat and whisked away until I had the right consistency. 

Curd Recipe from  Joy of Baking (I used limes instead of lemons)

 
3 large eggs
3/4 cup (150 grams) granulated white sugar
1/3 cup (80 ml) fresh (not bottled) lemon juice (2-3 lemons)
4 tablespoons (56 grams) unsalted butter, at room temperature
1 tablespoon (4 grams) lemon zest(The yellow outer skin of the lemon


Lemon Curd:  In a stainless steel bowl, placed over a saucepan of simmering water, whisk together the eggs, sugar, and lemon juice until blended. 
Cook, whisking or stirring constantly (to prevent it from curdling), until the mixture becomes pale in color and quite thick (like a hollandaise sauce or sour cream) (160 degrees F or 71 degrees C on a thermometer). This will take about 10 minutes. Remove from heat and immediately pour through a fine strainer to remove any lumps. Cut the butter into small pieces and whisk into the mixture until the butter has melted. Add the lemon zest, cover with plastic wrap to prevent a skin from forming, and let cool to room temperature before filling the pastry crust. Can be made and stored in the refrigerator for about a week.

  
The Curd:


After the curd cools, spoon into tart shells and top with fruit. You might want to chill the tarts in the fridge for at least 30 minutes before serving so it give the curd a chance to firm up. I've also just decided the word "curd" is not appealing and should be changed.

Saturday, April 16, 2011

Sea Shell Cupcakes

So I have been trying to think of creative, yet easy to make lots of, beach themed cupcakes for Ashley's wedding. Sea shells were a must and I decided chocolate molds would be both elegant and easy. I remembered making chocolate molds of hearts when I was 6 at a friends birthday but that pretty much summed up my chocolate experience so I was a little hesitant at first. However, I found it was super easy and turned out pretty cute.


First things first - melt white chocolate and milk chocolate in the microwave. Set microwave for 30 seconds, then stir, and repeat until smooth consistency.


Transfer melted chocolate to separate zip lock bags.


I poured the white chocolate in almost to the top and then squeezed some milk chocolate on top. I then took a tooth pick and swirled the chocolates together. Since my molding sheet was clear, I could hold it upside down and see where more swirling needed to be done.

I put the molding sheet in the fridge until the chocolates hardened (about 20 min.) and then popped them out. Tah Dah!


Frost the cupcakes - I was going for a baby blue here.. I need to work on my icing coloring skills.


And then top with the sea shells :)

Monday, April 11, 2011

Isomalt Coral

A few weeks ago the National Cake Show came to town. I found a Living Social deal for half off tickets and thought it might be fun to check out. I also dragged Jake to this show which I do kind of feel bad about especially after hour two of me freaking out about cool cake supplies... It's ok though, he has dragged me to a few gun and knife shows and made me go paint balling for 5 hours one Saturday. I don't care what some people say, paint balling hurts.

Anyways, so while I was at the show, I went to an Isomalt demonstration. Isomalt is basically like a stick of sugar that when melted can be made into decorations. I bought it because you can make some pretty cool coral sculptures that I thought might look nice with Ashley's beach themed cupcake display.

This is what Isomalt looks like in solid form:

I broke up about six sticks of  Isomalt and microwaved them for 15 seconds at a time stirring in between until completely melted. I then added some green gel food coloring. (The mixture should bubble at this point).

In order to make coral, I used the ice method in which I greased a large glass and filled it with ice cubes.


I poured the hot Isomalt over the ice slowly. Toward the end of the pour, I tried to make a base at the top by slowly pouring in a more concentrated spot. After the Isomalt cooled (like 20 seconds), I carefully dumped the glass upside down in a bowl. The figure below is the end result.


I thought it turned out pretty cool and doesn't melt in humidity like most sugar sculptures. You might want to note that even with a greased cup, Isomalt may still stick. You can either chip off stuck Isomalt with the end of a butter knife or dissolve with hot water.

Here are pictures of some of the cakes at the show I thought were particularly cool :)


Thursday, March 31, 2011

Flip Flop Chocolate Coconut Cupcakes

I've been test baking cupcakes for Ashley's wedding for a a couple months now and thought it was time to give her beach themed wedding cupcake decorations a shot. I've always wanted to try marshmallow fondant so I thought flip flops would be an easy decoration to try it with.
I've been searching for a chocolate cupcake recipe that packed more of a chocolate punch then my George Town Chocolate Cupcakes I made a while back. These cupcakes weren't quite the chocolate overload creations I was looking for but they tasted great, were light and fluffy, and stayed moist even after being frozen for a few weeks. I love that the recipe uses sour cream to give a more rounded flavor and to keep the cakes from drying out too quickly.   

All in all, these were pretty yummy cupcakes so I'm calling it a success :)


Recipe from Martha Stewart
  • 3/4 cup unsweetened Dutch-process cocoa powder
  • 3/4 cup hot water
  • 3 cups all-purpose flour
  • 1 teaspoon baking soda
  • 1 teaspoon baking powder
  • 1 1/4 teaspoons coarse salt
  • 1 1/2 cups (3 sticks) unsalted butter
  • 2 1/4 cups sugar
  • 4 large eggs, room temperature
  • 1 tablespoon plus 1 teaspoon pure vanilla extract
  • 1 cup sour cream, room temperature

  1. Preheat oven to 350 degrees. Line standard muffin tins with paper liners. Whisk together cocoa and hot water until smooth. In another bowl, whisk together flour, baking soda, baking powder, and salt.
  2. Melt butter with sugar in a saucepan over medium-low heat, stirring to combine. Remove from heat, and pour into a mixing bowl. With an electric mixer on medium-low speed, beat until mixture is cooled, 4 to 5 minutes. Add eggs, one at a time, beating until each is incorporated, scraping down sides of bowl as needed. Add vanilla, then cocoa mixture, and beat until combined. Reduce speed to low. Add flour mixture in two batches, alternating with the sour cream, and beating until just combined after each.
  3. Divide batter evenly among lined cups, filling each three-
    quarters full. Bake, rotating tins halfway through, until a cake tester inserted in centers comes out clean, about 20 minutes. Transfer tins to wire racks to cool 15 minutes; turn out cupcakes onto racks and let cool completely. Cupcakes can be stored overnight at room temperature, or frozen up to 2 months, in airtight containers.


I decorated mine with coconut frosting topped with toasted coconut and fondant flip flops.

For the frosting, I added some coconut extract to butter cream and beat until white and fluffy.

For the coconut, I toasted sweetened coconut on baking pan for 3-5 minutes at 350 degrees or until slightly browned.

For the flip flops, I made a marshmallow fondant by melting 2 cups of mini marshmallows in the microwave and then stirring in food coloring. I then added powdered sugar until a dough formed. I rolled and shaped small flip flops and then drew straps with a food marker. The marker ran on some of them so I would suggest piping icing.

Tuesday, March 22, 2011

Healthy Eggplant Parmesan

You know those foods that you thought were gross when you were little and now all of a sudden discover that you love them? This is true for the story of me and eggplant. I hated their texture, flavor, chewiness and weird shape. This all changed when I went to an Italian restaurant and mistakenly took a bite of what I thought was chicken Parmesan. I was happily surprised when I found out it was eggplant and so began my mission to make eggplant Parmesan not only from scratch, but healthy.

I think my version of the eggplant Parmesan actually tasted better then the Italian restaurants, but I'm slightly bias.. The eggplant was crispy on the outside and soft inside. It wasn't too chewy and definitely not soggy. Jake still has it in his head that he hates eggplant but he did eat a few pieces :)


The trick to making sure the eggplant doesn't come out soggy is to make sure you "weep it" after you cut it in order to remove some of the moisture. I salted both sides of the eggplant and left them on a paper towel to "weep" for about 20-30 minutes.

Once you see some pools of liquid, wipe off the salt and moisture.

Recipe adapted from Bakin and Eggs:
1 eggplant cut into 1/4 inch rounds
1 1/2 cups Italian panko bread crumbs
1 cup flour
1 egg beat plus a splash of water
1/4 cup shredded Parmesan cheese
1 cup mozzarella cheese
2 tbs olive oil
2 tbs salt

"Weep" the eggplant for 30 minutes then wipe off salt and moisture. Preheat oven to 400 degrees. Dredge each piece of eggplant in flour, then transfer to egg wash, and finally coat with a mixture of Parmesan cheese and bread crumbs. Lay on a wire rack that has been sprayed with non stick cooking spray. Brush the tops of eggplants with olive oil and bake for 15 minutes. Flip the eggplants and continue baking for 15 minutes. Top each eggplant with mozzarella cheese and bake until melted (about 3 minutes).

I served mine over spaghetti :)


Friday, March 18, 2011

Key Lime Pie Cupcakes


My favorite pie by far is Key Lime Pie. When Jake's sister, Ashley, asked me to bake some beach themed cupcakes for her wedding, my heart and tummy went strait for Key Lime. These cupcakes are super moist and taste like you are taking a bite of Key Lime Pie. No joke. I made them on a Sunday night and ate 2 strait out of the oven. I then proceeded to dream about them while at work on Monday and soon found myself having a Key Lime Cupcake dinner... healthy choice fail. Due to my lack of Key Lime self control, I will not be making these cupcakes again until Ashley's taste test :)

The only things I am going to do to tweak this recipe are increase the baking powder to 3 tsp and whip the egg whites to fold them into the batter before baking. Hopefully this will give them a less dense, more fluffy texture. Either way, I think these are my favorite cupcakes I've made so far. 


Recipe from Bitchin Camero

For the cake:
2 sticks (16 tbsp.) unsalted butter, room temperature
2 cups natural cane sugar
3 cups unbleached flour
1 tsp. salt
1 tsp. baking soda
4 large eggs, room temperature
1 cup sour cream, room temperature
1 tsp. vanilla extract
2/3 cup key lime juice, either from real key limes or bottled. I used Nell & Joe’s brand.

For the icing:
2 sticks (16 tbsp.) unsalted butter, room temperature
2 cups (16 oz.) cream cheese, room temperature
1 1/2 cups powdered sugar
1 tsp. vanilla extract

Preheat the oven to 350°. Line muffin pans with paper liners or mini muffin pans with mini liners.
Cream the butter and sugar in the bowl of an electric mixer fitted with the paddle attachment on high speed, until light and fluffy. On medium speed, add the eggs, 2 at a time, then add the sour cream and vanilla. Scrape down the sides then add the key lime juice. Turn the speed to medium-low and beat for another minute. Stop the mixer.
Sift together the flour, salt, and baking soda in a bowl. With the mixer on low speed (stir), add the flour mixture to the butter mixture until just combined. Fill the cupcake liners to the 2/3-level with batter. Bake in the center of the oven for 20 to 25 minutes for full-size or 15 minutes for mini. They’re done when a toothpick comes out clean. Cool to room temperature.
While the cakes cool, make the icing. Mix the butter, cream cheese, sugar, and vanilla in the bowl of an electric mixer fitted with the paddle attachment, on low speed until the sugar incorporates, then turn it up to high and whip for about 3 minutes. Spread the frosting generously on top of each cupcake.

Makes 2 dozen full-size cupcakes.

I topped mine with crushed graham crackers and green sprinkles :)

Sunday, February 27, 2011

Balsamic Blue Cheese Chicken

So I feel like I have cheese love affairs sometimes. There are just certain cheeses I can't get enough of for a few months at a time and then once I've had my full, I'll move on to the next. Right now I'm in a Blue Cheese love affair. I've been eating it on salads, on toast with apple slices, etc. I think my low point came when we went to Taco Bell and I covered my taco salad with Blue Cheese.. I found out then that Blue Cheese doesn't belong on everything I eat...
Anyways, Jake is not a fan of this cheese and last week I wanted to make a healthy chicken dinner. I made an easy chicken parm for Jake and I made myself a balsamic chicken dish.

Recipe:
1 chicken breast
1 bag 1/3 full with balsamic vinegar
2 slices Blue Cheese
Olive oil
Rosemary
Parsley
Basil

Let chicken marinate in bag with balsamic vinegar for 2 hours. Heat oil in skillet over medium heat. Sprinkle herbs on both sides of chicken and cook in pan until cooked through (about 5 minutes per side). Top with Blue Cheese.

I put my chicken on a bed of spinach, croutons, pecans and balsamic dressing. This was easy to make and definitely satisfied my Blue Cheese craving.

Tuesday, February 15, 2011

George Town Cupcake's Chocolate Ganche Cupcake

I have some exciting and happy news tonight. My sister in-law, Ashley, who was proposed to during half time of the Super Bowl, took me up on my offer to make the wedding cake, or should I say, wedding cupcakes :) Needless to say, I'm so excited about the opportunity to make cupcakes for such an awesome couple. I've made cakes, but never experimented much with cupcakes so I'll be taking the next couple months to try recipes and techniques. Since Ashley hasn't decided on specific flavors, I thought I should at least get started with some basic flavors. Chocolate was first on my list.

If you've ever been to George Town Cupcakes you know how freakishly good their cupcakes are. I searched the internet for their recipe and found that the only one they have released is for their chocolate cupcake with ganche frosting. This cupcake is more of a light cupcake with a dark chocolate taste. Since it isn't too rich, the heavy ganche frosting works really well.


This is the George Town Cupcake Recipe from the Washington Post:
For the cupcakes
  • 1 1/4 cups flour, sifted
  • 1/2 teaspoon baking soda, sifted
  • 1/4 teaspoon salt
  • 8 tablespoons (4 ounces) European-style unsalted butter, such as Plugra brand, at room temperature
  • 1 1/4 cups sugar
  • 2 large eggs, at room temperature
  • 1 1/4 teaspoons vanilla extract, preferably Madagascar bourbon
  • 1 cup whole milk, at room temperature
  • 1/2 cup Valrhona cocoa powder, sifted (see headnote; may substitute another good-quality cocoa powder)
For the ganache frosting
  • 1/2 cup heavy cream
  • 1 cup Callebaut semisweet chocolate chips (6.4 ounces; see headnote; may substitute other good-quality semisweet chocolate chips)

Directions:

For the cupcakes: Preheat the oven to 350 degrees. Line a standard cupcake pan with 12 baking cups, and a second pan with 6 baking cups.
Sift together the flour, baking soda and salt on a sheet of wax paper or parchment paper.
Place the butter in the bowl of a stand mixer or hand-held electric mixer. Beat on medium speed until fluffy. Stop to add the sugar; beat on medium speed until well incorporated.
Add the eggs one at a time, mixing slowly after each addition.
Combine the vanilla extract and milk in a large liquid measuring cup.
Reduce the speed to low. Add one-third of the flour mixture to the butter mixture, then gradually add one-third of the milk mixture, beating until well incorporated. Add another one-third of the flour mixture, followed by one-third of the milk mixture. Stop to scrape down the bowl as needed. Add the remaining flour mixture, followed by the remaining milk mixture, and beat just until combined.
Add the cocoa powder, beating (on low speed) just until incorporated.
Use a standard-size ice cream scoop to fill each cupcake paper with batter, so that the wells are two-thirds full. Bake for 18 to 20 minutes (start checking at 15 minutes) or until a toothpick inserted into the center of a cupcake comes out clean. Transfer the pan to a wire rack to cool completely.

For the ganache frosting: Lay a large piece of wax paper on the work surface.
Combine the heavy cream and chocolate in a medium heatproof bowl. Fill a medium saucepan with an inch or two of water and place over medium-low heat. Place the bowl over the saucepan and let the mixture melt, stirring until it is shiny and smooth.
Remove the bowl of chocolate ganache from the saucepan; let it cool slightly, for 2 to 3 minutes. Working with 1 cupcake at a time, carefully dip each cupcake top in the warm ganache, twisting your wrist as needed to make sure the cupcake top gets completely coated. To prevent drips, quickly turn the cupcake right side up and place on the wax paper. Allow the ganache to set for 5 minutes before serving.

 I topped mine with different sprinkles :)

I really wanted Jake to try one but he isn't a big chocolate person. He is a peanut butter and chocolate kind of guy though! I mixed some peanut butter, powder sugar, and milk to make a peanut butter spread for the top of his cupcake. I then topped that with the ganche. Success!

Tuesday, February 8, 2011

Chicken Lettuce Wrap happiness

Last night I surprised myself, and Jake, when I put together a lettuce wrap dinner. We both had our doubts and PB&Js on hand when I started but were happily satisfied with the results. This meal will definitely be an addition to our week day dinner rotation.

Chicken Lettuce Wraps


Recipe:
1 package ground chicken
8oz water chestnuts, chopped
1/2 cashews, chopped
1/2 cup shredded carrots
2 tbs sesame oil
1 tbs Chinese 5 spice
1 tbs finely grated ginger
1/2 tbs minced garlic
1/2 tbs salt
3 tbs hoisin sauce
2 tbs soy sauce
2 tbs teriyaki sauce
1 head Boston lettuce

Heat oil in pan over medium heat. Add chicken, ginger, garlic, and 5 spice and cook until browned. Add hoisin, teriyaki, soy sauce, and salt and combine mixture. Then add carrots, water chestnuts, and cashews and simmer for 5 minutes. Serve with lettuce leaves and enjoy. 

This meal is also great because it can be made in one pan and is pretty easy to throw together.

Yummy... 


Tuesday, January 25, 2011

Apricot Chicken

This recipe is easy to make and helps mix up "chicken dinner" night. I had some apricot jelly that I had left over from holiday cooking and decided to try to incorporate it into dinner. You can use this recipe with different jellies and cheeses. I'm sure it would be great with pepper jelly and pepper jack cheese, apple jelly and brie, etc.
Recipe:
2 chicken breasts
1 slice swiss cheese
4 tbs apricot jelly
Cayenne Pepper powder
Salt
Pepper

Pat chicken dry and then sprinkle both sides with salt, pepper, and cayenne powder. Cook in an oiled skillet over medium heat until chicken is cooked through. Top each chicken breast with jelly and half a slice of swiss. Remove from heat and put pan top on to hold in heat to melt the cheese. Serve when cheese has melted.

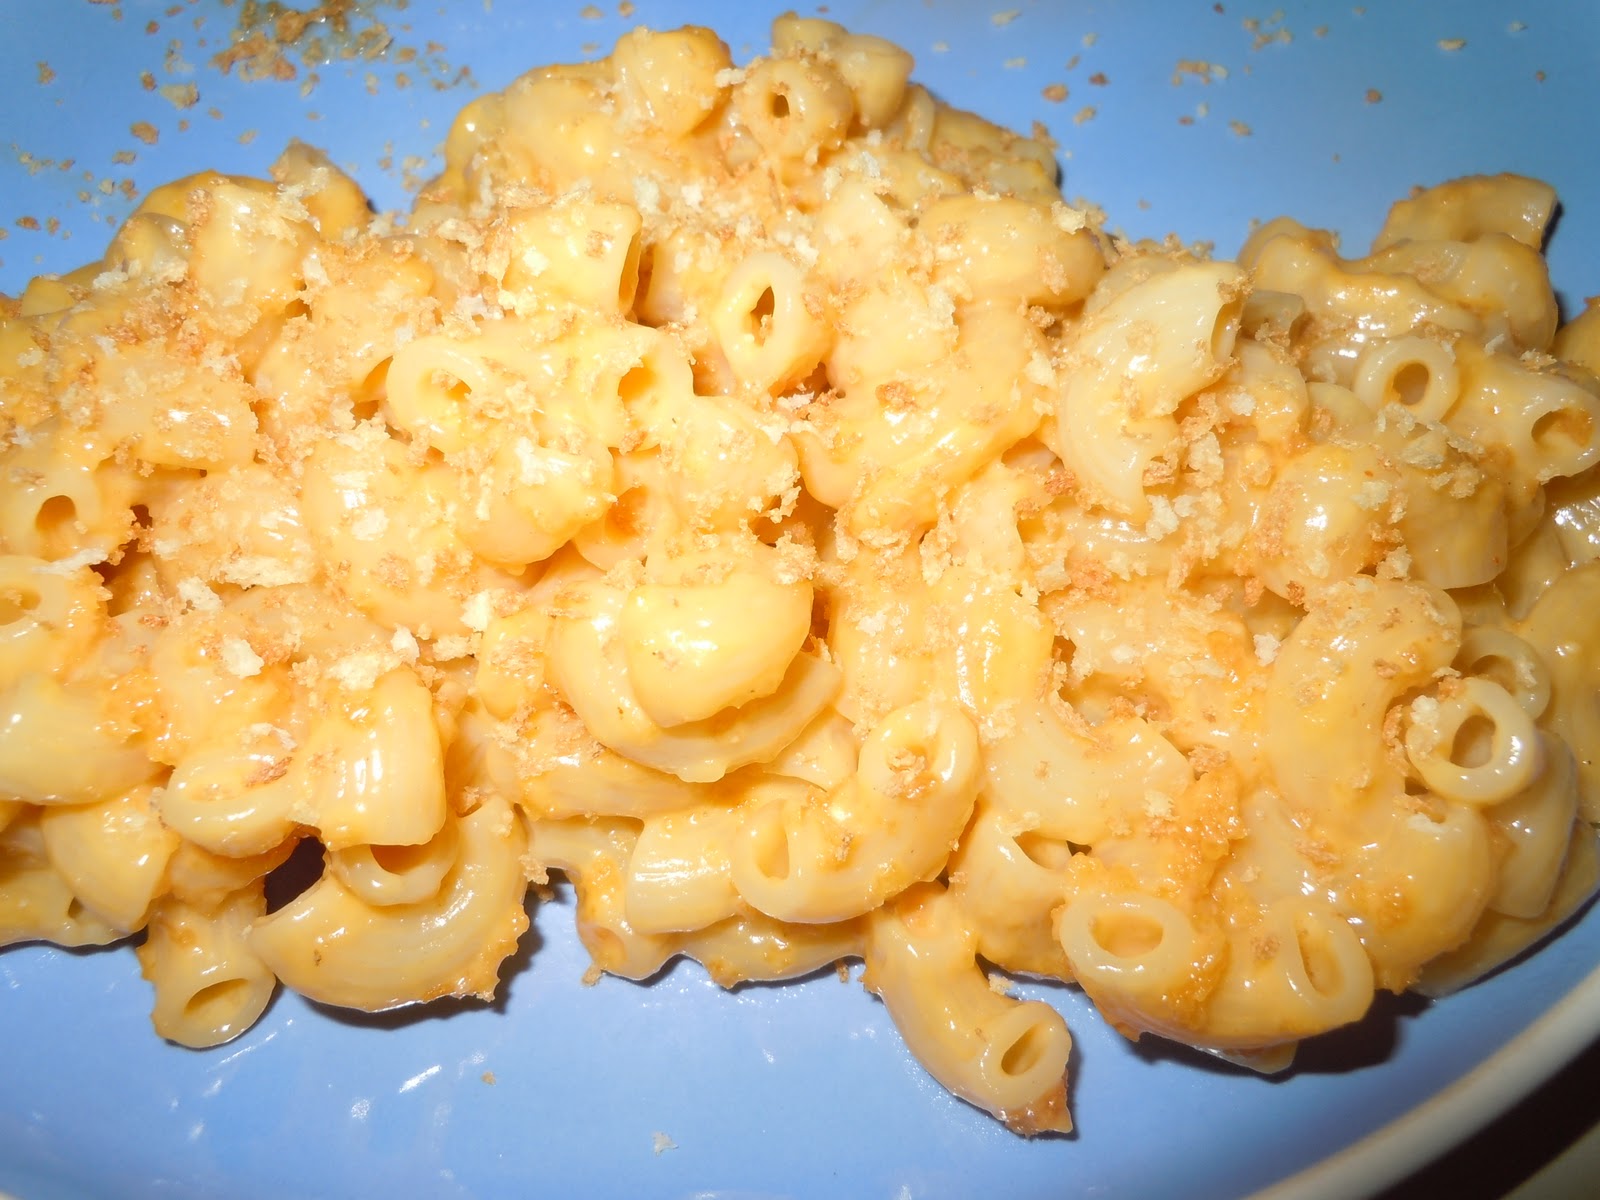
Jake has been trying to help out in the kitchen and committed to make a side to go along with our apricot chicken and salad. He tackled the Kraft Home Style Mac and Cheese kit :)


Pretty delicious. Can't go wrong with mac and cheese topped with toasted bread crumbs.

Thursday, January 20, 2011

Chicken and Dumplings.. and the importance of first-year-o-marriage back ups

So this week I figured out I like the idea of chicken and dumplings way more then I liked the actual dish. I came across an interesting recipe on the Pink Parsley blog. It is a chicken and dumpling dish that uses Salsa Verde which adds a kick and herb cornmeal dumplings which adds more flavor.

It took about an hour to put together but I had been cold all day and had the motivation to make a super comforting food.


        Recipe found here.

The first few bites tasted awesome. It had a lot of flavor, spice, and was incredibly rich. However, it was way too heavy for Jake and I to eat as a meal. We had ate about 1/4 of our plate and agreed that the rest was going to have to go in the fridge for another time.

In came my first-year-o-marriage back up food. Since I like to try new recipes quite a bit, it is crucial I have back up food in case the recipe is a flop. Some of these back ups include hot pockets, chicken pot pies, skillet meals, and of course toasted PB&J.

I think I got way more compliments on my 3 minute PB&Js then the hour long chicken and dumplings with fresh cut herbs, but I'll take what I can get :)

Thursday, January 13, 2011

Lemon Pepper Chicken Home Made Crouton Salad and Fresh Bought Ravioli Ridiculousness

One of the things I will miss about my old job is its close location to Eastern Market. They have a large indoor market with all sorts of fresh and hand made foods. I particularly love the home made pasta section. Earlier this week I bought these little beauties:
Hand made cheese ravioli with pretty stripes.
I boiled them for about 3 minutes and they were done! Fresh pasta has so much more flavor then store bought pasta and cooks in about a third of the time. I try to buy it anytime I come across it.
I topped it with my home made marinara sauce and....
Yummmy ridiculousness!
I know Jake doesn't consider food a meal without a meat so I grilled up some easy lemon pepper chicken.
Recipe:
4 chicken strip cuts
Lemon pepper seasoning
2 tbs olive oil

Heat oil in pan over medium heat. Remove chicken strips from package and pat dry. Season both sides with the lemon pepper seasoning. Cook for about 8 minutes flipping chicken half way through. Remove once chicken is fully cooked through. Makes 2 servings.


I topped mine with a raspberry walnut light dressing and Jake went with the light ranch. I forgot to buy croutons at the store so I thought I would give home made croutons a shot.
Recipe:
4 pieces of Healthy White or Wheat bread cut into bite sized cubes
2 tbs olive oil
1/2 tbs of salt
1/2 tbs of pepper
1/2 tbs of garlic powder
1 tbs dried parsley

Preheat oven to 350 degrees. Toss bread cubes with oil. Add seasoning and gently toss again. Arrange on tin foil lined baking sheet in a single layer. Bake for about 10-15 minutes or until bread is golden brown. 

They turned out pretty good and definitely more healthy then store bought croutons. I might try adding Parmesan cheese next time as well.